
OK. Let me first say that handspindling gave me fits and that my husband had to censor me more than once with bleeps when I was learning. But I got it down pat, and ultimately I bought the wheel (incidentally, I'm calling her Charlotte. As in Charlotte A. Cavatica.) And so I offer my tips for spinning.
1. Make sure you have a good spindle. I started with a bottom-whorl spindle I picked up on the web, and within 48 hours had trekked to the LYS and purchased an Ashford top-whorl. Having the right spindle makes a HUGE difference in learning to spin. The Ashfords are under $20, and, well, I mean, c'mon. It's what they do ... it's what they live for.
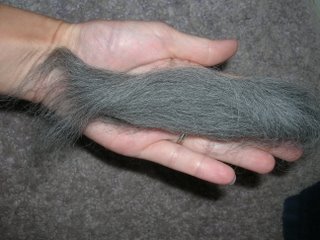
2. Start with a small bit of roving, not a huge piece. About hand-size oughta do it.
3. Pick a fiber that works for you. I tried spinning first with wool, and ironically, the results were disasterous. I had an awful time drafting it, and hated it. So, when I picked up my Ashford spindle, I also picked up some alpaca. My advice? If you can, try playing with some fiber at the store before bringing it home. It's much easier to start with something that has a smooth draft.
4. Pre-draft the roving. When life gives you a big fat Sharpie, turn it into a pencil. That's right, take some time to draft the roving out to spinning width. Using two hands, hold the roving in your left hand and gently tug a little out at a time with your right hand. Turn that hand-sized bit into a long length of ready-to-spin fiber.


5. Start a leader. Instructions tell you to start with some handspun or commercially spun yarn as a leader. I prefer to use whichever fiber I'm working with. Don't ask me why; I have no idea. It just seems easier for me. Start the leader by looping about an inch of your under the hook on your spindle. Like this:
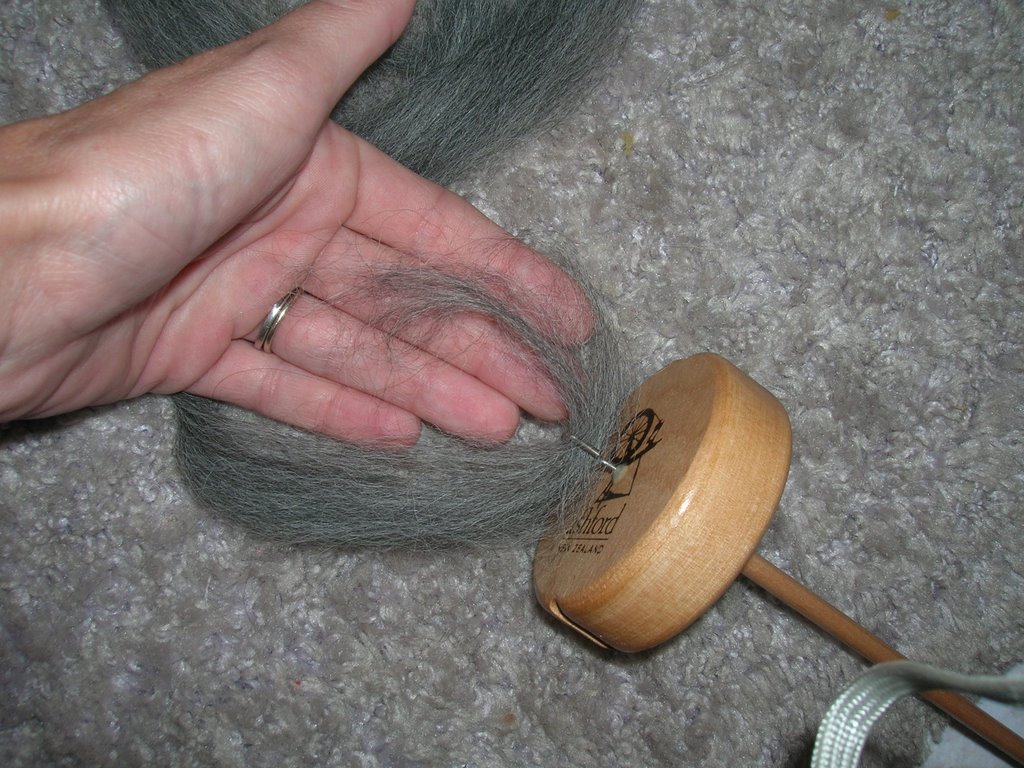
And then pinch the end in with the rest and give the spindle a spin. Don't worry if it's big and fat. It's the leader, after all, and if you start off making thicker yarn, then you have few problems with breaks early on. That said, spin that spindle and practice moving your left fingers back until you have three or four inches of leader. Use the "spin and park" technique. (When the spindle stops, park it between your knees.) It will stop rather quickly because 1) you're working with thicker yarn (which doesn't need much twist); and 2) you're working on a small drafted amount (it won't take the twist long to move up your drafted portion). Take a minute and make a leader and then wind it on your spindle.

6. Spin the spindle. Hold the spindle between your knees with the fiber in your right hand. Pinch the leader (what you already spun) with your left hand, (ignore the rest of the fiber for a minute) and give the spindle a spin. Then park it between your knees.
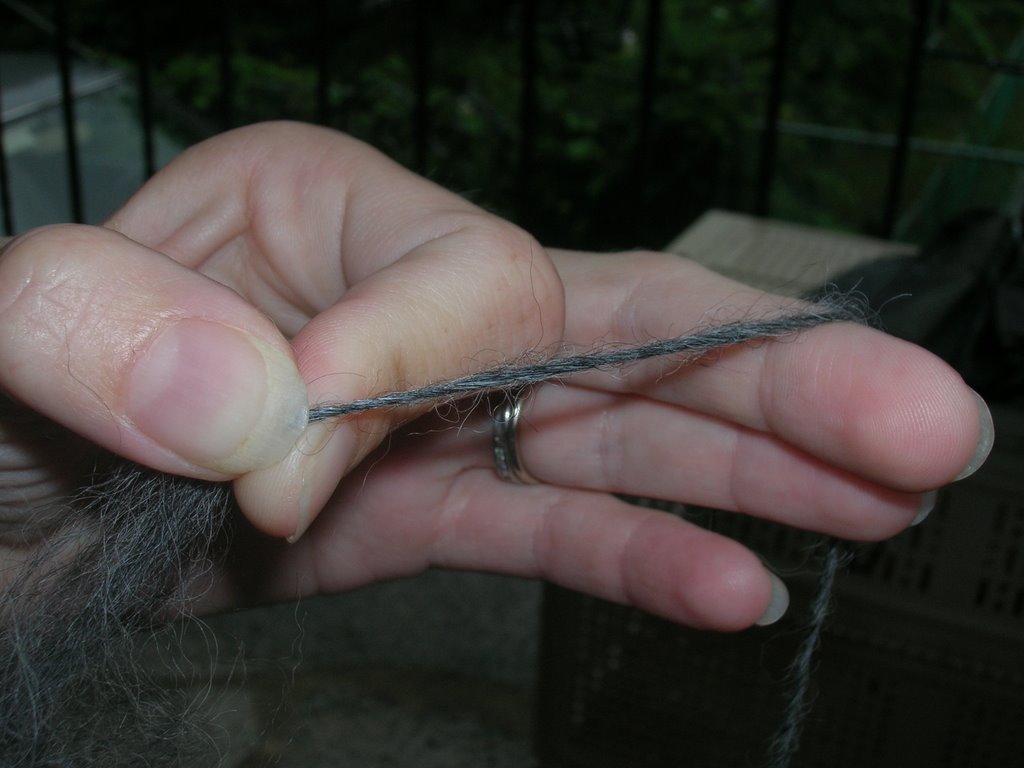
7. Let in some twist. You may notice at this point that you feel some tension in the already-spun yarn. That's the force of the twist building up. It's what you want to feel. That said, with the spindle parked and your right hand free, use your right fingers to pinch just to the right of your left fingers. Don't release your left fingers until you have pinched with the right hand. Then, place the left fingers a few inches up the fiber supply. You should be holding a segment that looks like this (I'm only using one hand here because I needed one to use the camera. Pay attention to the arrows -- the red arrow is where your right hand should be pinching. The green arrow is where the twist buildup should be, the blue area your drafted-but-yet-untwisted fiber and the yellow the rest of your fiber supply.)
![]()
Now, you basically want to do that same "sleight of hand" trick you did before to let the twist in to your segment. Keep your left hand pinching off the fiber supply. Release your right pinch, and watch the twist move up the fiber. See that? Voila! Yarn!
And now, you go back to the beginning of steps 6&7. Keep going until you have enough to wind on the spindle shaft. Wind it up, but be sure to leave enough above the whorl to have enough to work with.

Let me stress my personal opinion that handspinning on a spindle is more about the way your hands move than about the way the spindle turns. Learning on a handspindle REALLY helped me learn the basics that I was then able to transfer over the wheel spinning (which goes so much faster -- it's easier to slow the process for learning purposes this way). It also helps because you're working with smaller amounts of fibers and therefore you're less likely to ruin large amounts while you're learning. That said... GOOD LUCK!
3 comments:
This is great information! Thanks for sharing your knowledge with us. Now I can hardly wait for my drop spindle class!
Very helpful! I've just dabbled with my drop spindle so far, but I'm not getting it as quickly as I thought I would. Anyway, you asked a question some time ago about the Harrisonville rigid heddle loom. I apologize for the slow response (life with a babe!)and hope it's okay to respond here since I don't know if you'd see it on my blog. I've found the loom very easy to rewrap, although the first couple times I was a little fumble-fingered with it. You definitely don't need a kit or any particular yarn. Both my older kids (8 and 5) can use this loom, so we all have been working on the same length for some time now. I think you'll really enjoy it!
Thanks for this Post - I found it through the other Wendy. I taught myself to spin about 3 weeks ago using resources on the internet and a book and I'm already hooked. Your post helped to confirm that I am doingit right:-) (well sort of)
Post a Comment